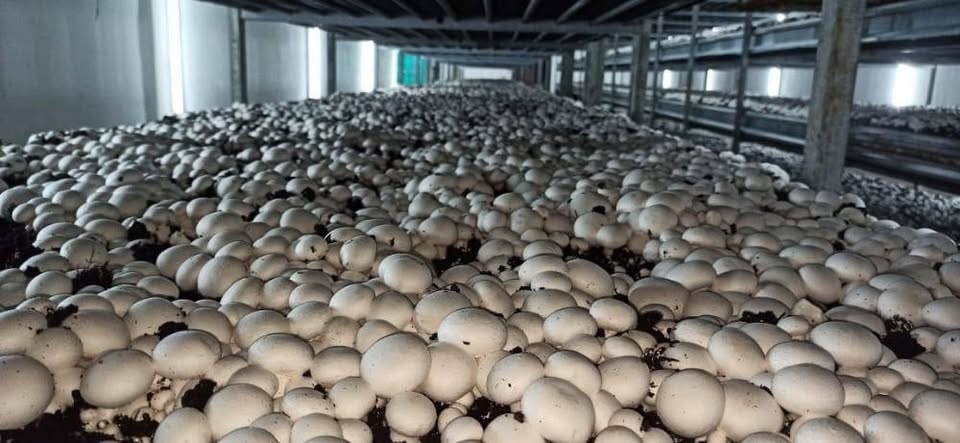
Figures on this page are typical industry ranges for general guidance. The right values for your farm depend on your strain, compost, climate-control equipment and practices — ask our team or your technical advisor.
Button Mushroom Cultivation
Button Mushroom (Agaricus bisporus) is grown on a selective, pasteurized compost. A crop moves through clear stages, and each stage depends on the one before it:
- Composting — Phase I (outdoor / bunker) and Phase II (pasteurization and conditioning).
- Spawning — spawn is mixed evenly through the finished compost.
- Spawn run — mycelium colonizes the compost.
- Casing — a casing layer is applied over the colonized compost.
- Case run and pinning — mycelium grows into the casing; climate is changed to trigger pin formation.
- Cropping — mushrooms are harvested in successive flushes.
- Cook-out — the room is steamed out at the end of the crop to protect the next one.
Spawn quality matters most at the start, but compost quality, climate control and hygiene decide the outcome of the whole crop.
Spawn Storage Guide
Spawn is alive and keeps growing and producing heat. Good storage slows it down without damaging it.
- Store spawn cool — refrigerated storage of about 2–4 °C is commonly used when spawn is not used immediately.
- Do not freeze spawn.
- Keep away from heat, direct sunlight and strong odours or chemicals.
- Do not stack packets tightly — leave space for air so heat can escape.
- Use spawn as soon as practical and within the period advised for your batch.
- During transport, keep spawn cool and shaded; avoid long hot journeys.
Compost Preparation
Compost is the food source for the crop. It is usually made from wheat straw, poultry manure and gypsum (plus other approved ingredients), prepared in two phases.
Phase I
Ingredients are wetted, mixed and turned so that composting proceeds evenly. The aim is uniform moisture and decomposition throughout the mass.
Phase II — pasteurization and conditioning
Compost is pasteurized (typically held around 57–60 °C for several hours) to kill pests and competitors, then conditioned (typically around 45–48 °C) until ammonia has cleared. Compost with residual ammonia must not be spawned.
Ready for spawning — what to check
- No smell of ammonia.
- Dark brown, pliable straw with a good structure.
- Even moisture — water should not drip freely when squeezed.
- Compost temperature brought down to a suitable spawning temperature.
Spawning Guide
Spawning means mixing spawn evenly through the compost. Uniform distribution gives an even spawn run.
- Spawn only ammonia-free compost that has cooled to a suitable temperature (commonly around 24–26 °C).
- Follow the recommended spawning rate — commonly about 0.5–0.75 % of compost weight; confirm the rate for your strain with us.
- Mix thoroughly so grains are spread through the full depth of compost.
- Fill and level beds or bags evenly and press lightly.
- Cover to limit moisture loss and contamination.
- Choosing a strain? See Compare Strains or ask our team.
Spawn Run
During spawn run the mycelium grows through the compost. The goal is fast, even colonization without overheating.
- Compost temperature — commonly kept around 24–26 °C. Avoid overheating; high compost temperatures can damage mycelium.
- Humidity — high relative humidity (commonly 85–95 %) to stop the compost surface drying out.
- CO₂ — elevated CO₂ is normal and acceptable during spawn run; fresh air is kept low.
- Duration — commonly about two weeks, depending on strain, compost and temperature.
- Check daily for uneven growth, wet patches, off-smells or mould.
Casing Management
Casing is a layer applied over fully colonized compost. It holds water and provides the conditions for pin formation.
- Use a clean, pasteurized casing material with good water-holding capacity and structure.
- Apply an even layer (commonly about 3–5 cm).
- Water in stages so the casing is moist but the compost below is not waterlogged.
- Keep conditions similar to spawn run while mycelium grows into the casing (case run).
- Casing is a common entry point for disease — keep materials and tools clean.
Pinning & Fruiting
When mycelium has grown into the casing, climate is changed to trigger pinning — commonly by lowering air temperature and CO₂ with fresh air.
- Air temperature — commonly lowered to about 16–18 °C.
- CO₂ — reduced with fresh air (commonly below about 1,000 ppm) during cropping.
- Humidity — commonly 85–90 %; avoid water standing on caps.
- Watering — light, regular watering between flushes to keep casing moist.
- Harvest — pick before the veil opens, by size required by your market; flushes typically come every 7–10 days.
Mushroom Diseases
Most disease problems start with poor hygiene or poor compost or casing. Early identification and removal limit the spread.
- Dry bubble (Lecanicillium / Verticillium) — distorted, spotted mushrooms; spread by flies, water splash and workers.
- Wet bubble (Mycogone perniciosa) — soft, deformed masses that may ooze amber droplets.
- Cobweb (Cladobotryum) — fluffy white-grey growth over casing and mushrooms.
- Green mould (Trichoderma) — green patches in compost or casing; often linked to compost or hygiene problems.
- Bacterial blotch (Pseudomonas tolaasii) — yellow-brown spots on caps, worse with water on caps and poor evaporation.
- False truffle (Diehliomyces microsporus) — cream, brain-like growth in compost; associated with high temperatures.
- Pests — sciarid and phorid flies spread disease; use screens, hygiene and monitoring.
For diagnosis and control on your farm, consult a qualified mushroom technical advisor.
Downloadable Guides
Printable guides on spawn handling, storage and spawning are being prepared. Ask us on WhatsApp and we will send you the current versions.